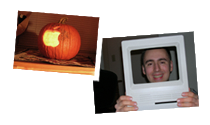
Double take
At first glance people have mistaken my little netbook for some sort of new Macbook Air. It runs the Mac OS, has the unmistakable glowing apple logo, and has an elegant simple clamshell design. At second glance people were still fooled. Only after telling them would they know it wasn't a genuine Apple.
Challenging times
In September 2010 I bought a factory refurbished Asus netbook from Woot.com to resell on eBay. Because of a number of changes going on in my life (including finding a new job, moving and getting married,) it stood in storage for several months. By February 2011 I decided to sell my main computer at the time, a MacBook Pro, to cover bills. I wasn't happy about it. Still I did what I had to. I pressed the netbook into service so I could continue searching for jobs online and selling on eBay.
Equal parts necessity and rebellion
I had a big problem though. Most of the design programs that I own (Adobe Creative Suite 1) are the Macintosh-only versions, and the Asus Netbook ran Windows XP. This arrangement simply wouldn't work. I could have tried running freeware graphics programs built for Windows, but so many of my existing files were in Adobe format that it would be a major pain to convert them.Instead I decided on doing something a hard, creative and a little rebellious. I decided to make the netbook run the Mac OS.
Installing Mac OS X on a PC is a technically involved, messy process and it can be prone to failure. Apple doesn't endorse doing this or provide any technical support whatsoever for doing it. Still there are many adventurous people who have successfully installed Mac OS X on their netbooks. As it turned out the model I owned was among the ones that work the best with it.
To work!
Even though I was doing something Apple doesn't like, I don't believe in stealing software. I believe in supporting the people who develop it, even when times are tough for me. With the help of techniques I researched on the internet, I bought and installed a retail copy of Mac OS X Snow Leopard. After researching some of the methods others used to install the Mac OS, I did the same. It took about eight hours of trial and error, but I was able to install not only the Operating System but also all of my applications. When I was done the netbook just worked, and continued working with one exception; the wireless internet.
As it turns out the wireless radio on this netbook is a model that snaps in place on a Mini PCI-Express module. I was able to trade some computer parts with a fellow geek in exchange for an Apple WIFI radio that was compatible with the Mini PCI-Express connector. This involved taking the netbook apart. After removing the battery, the keyboard and various case screws I was able to remove the wireless radio and remove the radio. The Apple part was substantially longer than the one it replaced, but there was plenty of space left to install it after removing the standoff for the existing wireless radio.
A series of slow, careful cuts with an Exacto blade took care of the plastic standoff. Next I needed was to fashion a new standoff and attach it to hold the new module in place. I used an extra motherboard standoff I had left over from other Apple laptops I fixed. Perfect!
After I tested everything and found it to work, I turned my attention to the outside of the computer. It looked like a cross between the Black MacBook I owned three years prior and an 11” Macbook Air. It had a simple, pleasing wedge-shaped design and a beautiful matte finish on the outside. The design was so understated that only a small embossed logo decorated the outside, and a white painted on version adorned the upper left hand corner of the screen bezel.
To make the netbook look even more Mac-like, I carefully removed the screen bezel from the screen assembly and set it down on my workbench. At first I tried removing the painted on logo on the glossy screen bezel with alcohol and water, but it didn't work. I decided that stronger solvents might dissolve the delicate part so I sanded it with ultra fine grit sandpaper and water instead. The papers I used were 800 grit, 1000 grit and 2000 grit. I was left with a nice satin finish.
Next I removed the outer screen lid and installed a transparent apple logo from a broken laptop I scrapped earlier. These logos are actually just pieces of clear plastic that are inlaid into the outer case plastics of Mac laptops and sit flush with them. They are lit up by the screen's backlight bleeding through, and they are held in place from friction and from double sided tape that is placed on an inner lip on the logo.
Because this lip was larger than the opening I wanted to make I couldn't directly trace the logo onto the screen lid on the netbook. To get around this problem I digitized the logo on my flatbed scanner and printed out a template which I cut out. Next came positioning the logo. Since 2001 Apple has centered its' logos vertically and horizontally on the outer screen lids of its' notebook computers and this arrangement works well for them. It wouldn't work well on this netbook because it would leave the existing logo visible and the apple would butt up against it. Instead I decided to center the apple horizontally, but center it vertically at the top one third of the lid's height to eliminate the existing logo. This layout looks aesthetically pleasing also because it follows the rule of thirds.
After removing the outer lid, I traced the template carefully in pencil on it. With an Exacto blade I scored and cut the surface of the lid just inside of the lines I drew, so I could refine the edge later. After some fine tuning, fitting and refitting the logo into the opening and then trimming the opening again with the Exacto blade I had a very nice looking result. I applied double sided tape to the lip of the logo, added a piece of white craft plastic between the screen and the logo to act as a diffuser, and finally reassembled the case lid. Fantastic!

"My Sketchbook" is the blog of Tim Chorzempa, Web Designer, Graphic Designer and self admitted geek.
C'est la vie
NEWEST PROJECTS
Art Show Booth
A place to sell my artwork
Artwork Lean-to
Blue and White Hackintosh
Making lemons into lemonade
Digital picture frame
An old Mac laptop gets a new lease on life
Drawing monitor NEWEST PROJECTS Art Show Booth
A place to sell my artwork
Artwork Lean-to
Blue and White Hackintosh
Making lemons into lemonade
Digital picture frame
An old Mac laptop gets a new lease on life
Drawing monitor
A place to sell my artwork
Artwork Lean-to
Blue and White Hackintosh
Making lemons into lemonade
Digital picture frame
An old Mac laptop gets a new lease on life
Drawing monitor NEWEST PROJECTS Art Show Booth
A place to sell my artwork
Artwork Lean-to
Blue and White Hackintosh
Making lemons into lemonade
Digital picture frame
An old Mac laptop gets a new lease on life
Drawing monitor
Higher Ground Laptrap Computer bag
Twice cool
Twice cool
A place to sell my artwork
Artwork Lean-to
Blue and White Hackintosh
Making lemons into lemonade
Digital picture frame
An old Mac laptop gets a new lease on life
Drawing monitor NEWEST PROJECTS Art Show Booth
A place to sell my artwork
Artwork Lean-to
Blue and White Hackintosh
Making lemons into lemonade
Digital picture frame
An old Mac laptop gets a new lease on life
Drawing monitor